Lost
to Time
Down
here in the dark, it is often impossible to tell how much time has
passed. It's rather like a Vegas casino where all references to
time and its passage have been carefully removed. The normal
cues of sunlight or perhaps a clock or length of shadow are all absent
and before long one's sense of time (if possessed of it) begins to
skew terribly. This is compounded by curiosity and as you are
pulled ever deeper into the mystery and history of such a strange
place, the distractions can cause time to become completely lost to you.
|
Lowry
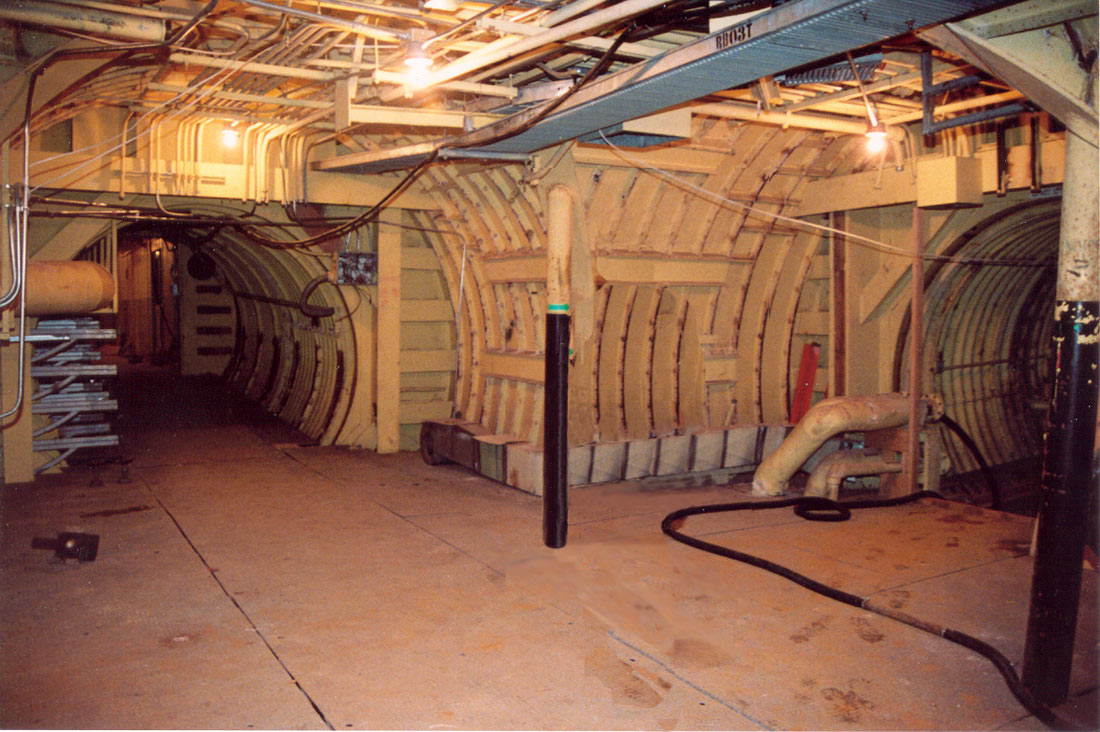
724-C, August 2005: View of the tunnel junction at the intersection
of the antenna, control center and launcher tunnels. A keen eye
will note that this photo is a victim of blatant Photo-shoppery and that someone
has been rather unskillfully edited out of the image and the resultant
void filled back in rather hastily.
|
|
Lowry
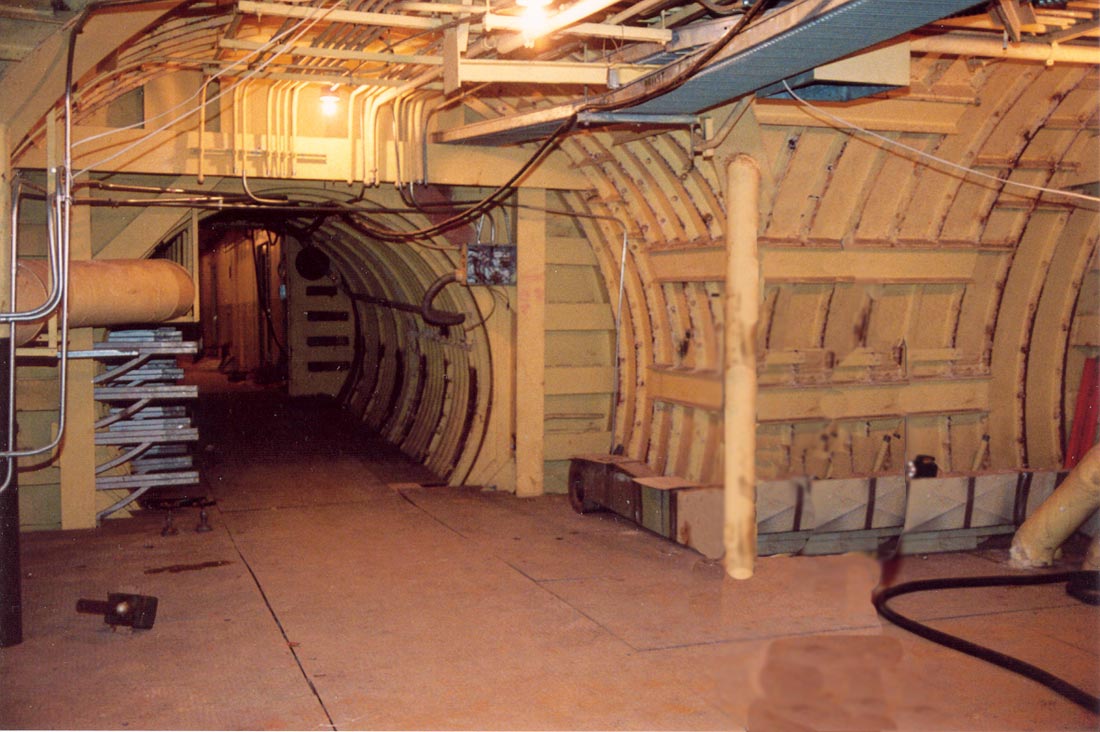
724-C, August 2005: Another view looking toward the entrance to the
control center. Once again, Photoshop has worked its magic on this
photo to remove completely and forever any trace of my countenance that
might otherwise offend the eye. Lucky you!
|
Of
course this effect of chronological disorientation is at its worst the
very first time you enter a Titan 1 site, but I can tell you from
experience that even after 20 visits to 724-C, I could not reliably
predict how long I'd been down there. Sure I knew it had been
hours since I trundled down the stairs, but it always seemed as though
any estimate I might make as to how much time I'd been underground was
always short by about 2 hours.
|
Lowry
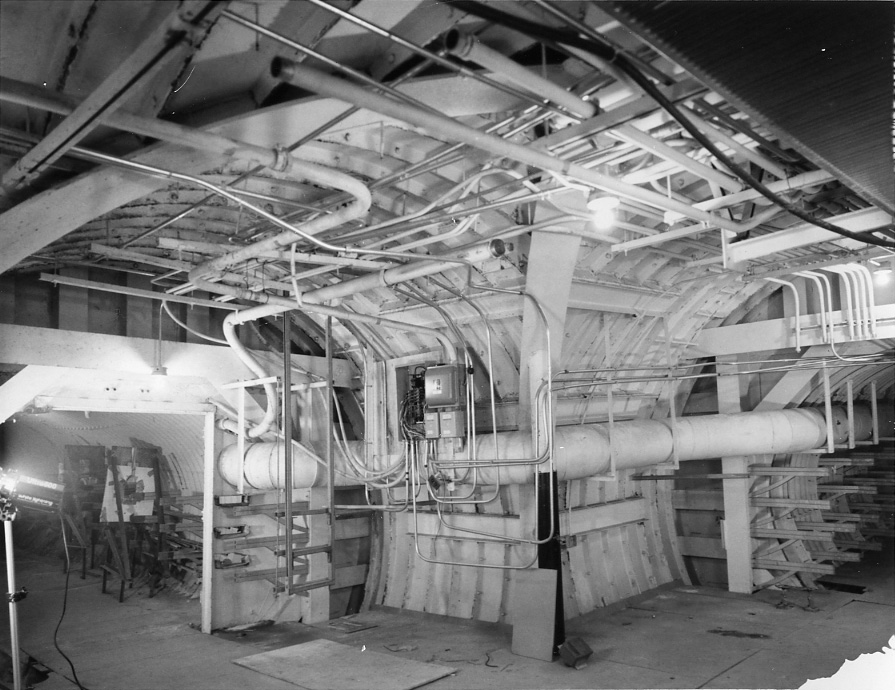
724-C, August 2005: ;Another of Harry Weddington's test prints made as
he was setting up for a much larger photo. To the left is the
antenna tunnel and to the right, the control center. In the
antenna tunnel you can see a couple more of the steel rigs used by
defense contractors as part of their ballistics testing. The white
blotch at lower right is just a defect common to Polaroid instant film.
|
|
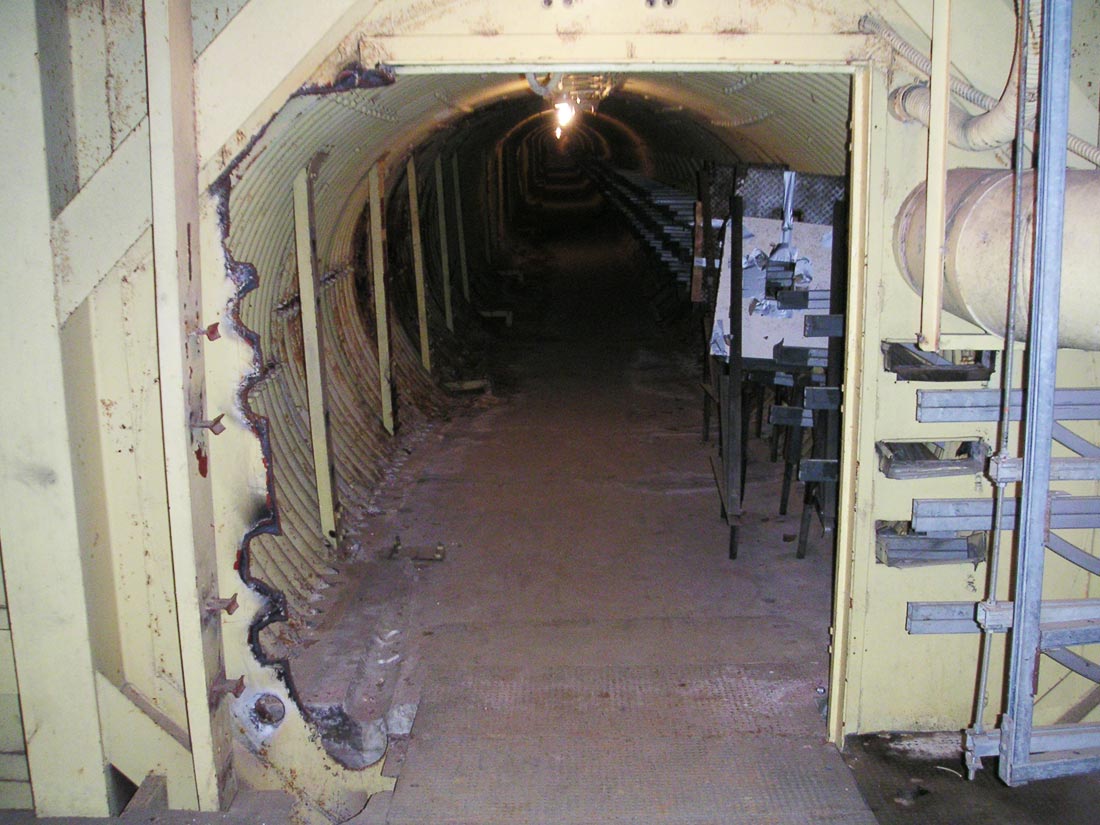
Lowry
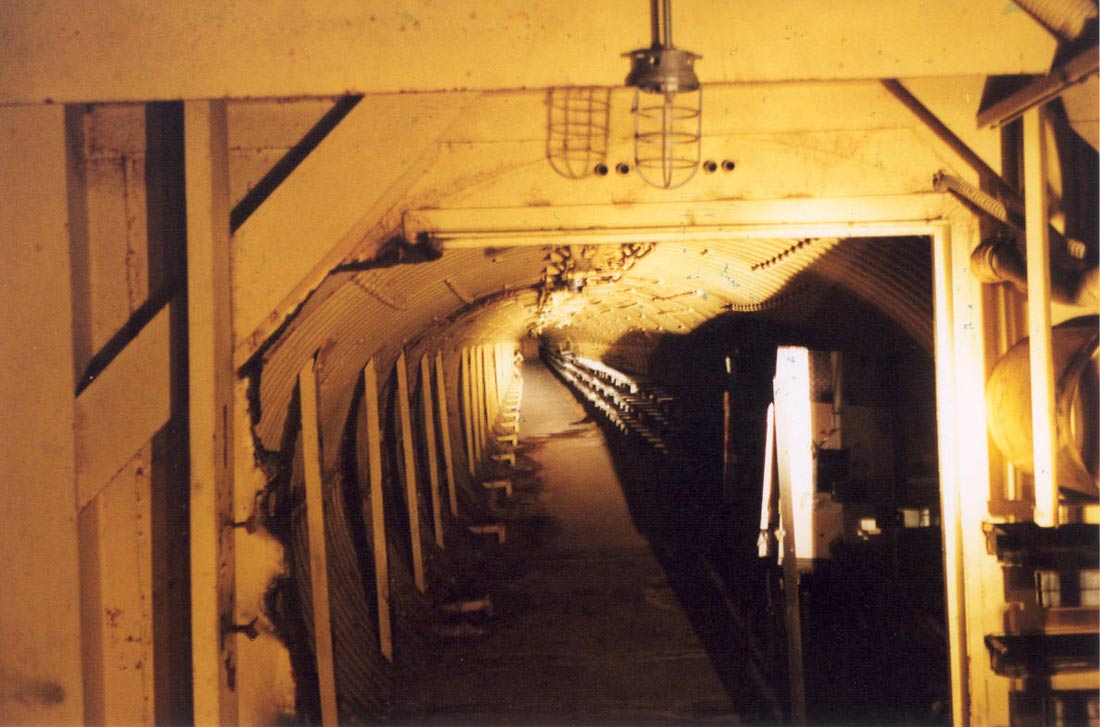
724-C, 1999: The mouth of the antenna tunnel. There was once a
steel door here but you can see that the door jamb has been cut away on
the left to remove piping that passed through the steel bulkhead.
Makeshift steel targets, cobbled together from bits and pieces of the
site rest on the right in the tunnel. The following photo is
better lit and gives a clearer view.
|
|
Lowry
724-C, August 2005: Another shot looking straight down the antenna tunnel. Once
again you can see the target rigs complete with steel plates and duct
tape standing in the tunnel.
|
|

Lowry
724-C, August 2005: Some commercial power has been brought down into the
site in order to bring electric light back to the underground complex.
A major boon, this was a great relief from being in complete darkness
and using batteries by the gross.
|
|
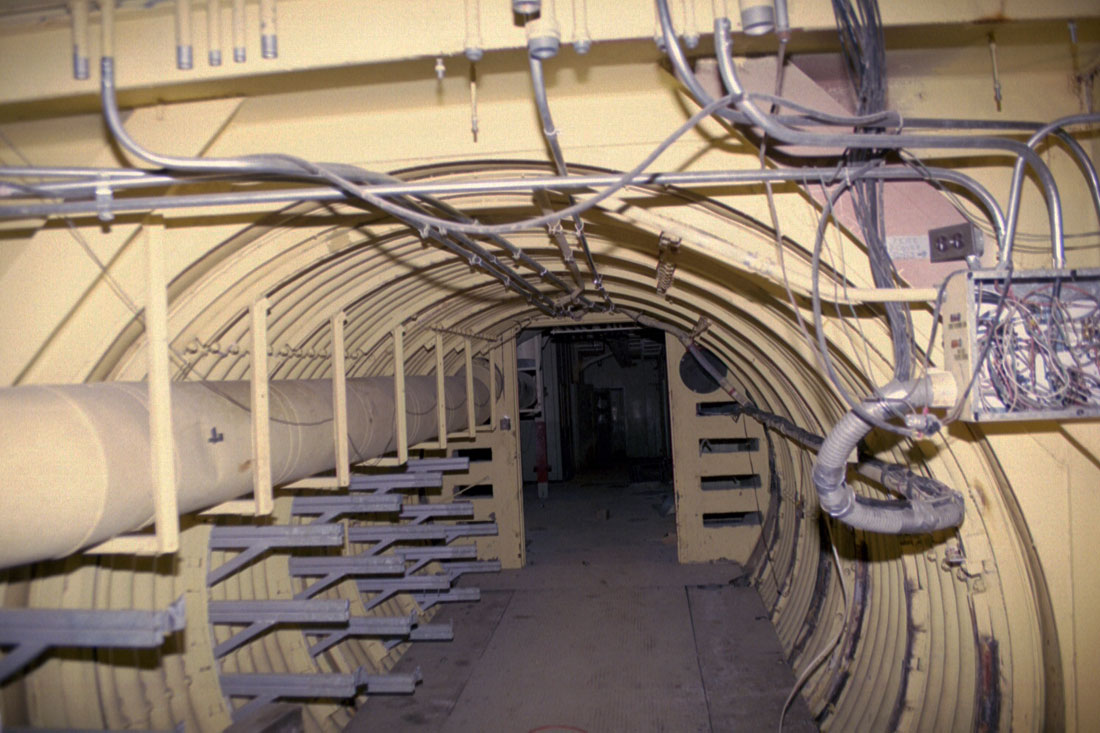
Lowry
724-C, August 2005: This is the short section of tunnel that connects
the main junction to the control center. This passage was once
jammed on both sides and above with cabling and conduit, all of which
has been removed. The conduit that is there was added later by
Falcon Research during their occupation of the site. Flanking this
passage were rows of cable trays carrying lines connecting all the
equipment and the launch, guidance and facilities consoles as well as
the Athena computer to the silos, equipment terminals and all other
areas of the complex. In short, this tunnel served as the spinal
cord to the entire Titan 1 missile site.
|
The
tangle of conduit and creative electrical work in the preceding 2
photos and a number of those which follow always appeared to be a bit
out of place. It was generally accepted that the conduit and
junction boxes had been added later and that much of it was scavenged
from around the site and used by the defense contractors occupying the
complex after its closure.
During
Summer of 2001, I traveled with the owner of 724-C* to visit a
Nike
site just north of the Golden Gate Bridge
that is open to the public and is funded by the National Park
Service. Run by retired AF missileers and volunteers, the site
was wonderfully maintained and they had restored most of the equipment
to working condition, although at the time, the work was still ongoing.
After
the tour, we took the opportunity to speak with the guys who worked at
the site and talked about the history and operation of the Nike
installations in California. They told us fascinating tales of
running military exercises and the diabolical trickery sometimes
employed by security inspectors to catch airmen off guard. The
dreaded inspectors (or even civilians working for them) would often
take advantage of their fatigue to test them under harsh conditions to
see if they would make mistakes. Penalties for mistakes
involving security could be severe, ranging from reassignment, being
demoted or even discharged. Some airmen were caught by these
surprise inspections to the permanent detriment of their military
career.
With
most of the visitors gone we continued talking about missiles and
brought out our photo albums of Lowry 724-C to show them what a Titan
I site was like as none of them had worked with a Titan system.
Paging through the albums, they talked excitedly about the size and
overall layout compared to the Nike sites and the construction methods
used.
When
we came to the photos of the electrical conduit shown in these
pictures you see here, they all simultaneously cried out "Who did
that? That's definitely not military work!" They
could immediately see that work like that would never pass
muster. We all had a good laugh over that.
If
you're in the neighborhood, I would highly recommend a visit to the
restored Nike site. The cost was about $4 or so and definitely
worth the trip.
*
Of course that was
back in 2001. 724-C is now owned by someone else, but hey, it's
for sale! Maybe the next owner could be YOU!
|
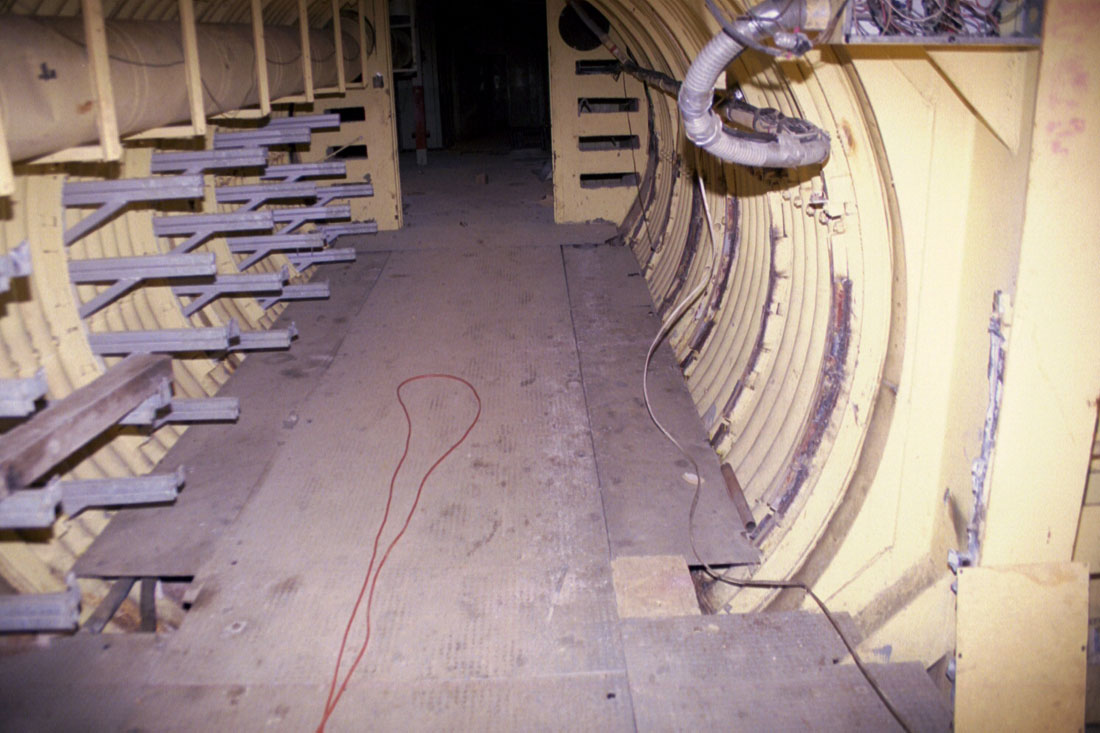
Lowry
724-C, August 2005: Another view of the tunnel connecting the main
junction and the control center. You can see the steel floor
panels here. Many times these were removed in other locations
since they were easy pickings.
Off
to the right you can see some of the clumsy wiring and reused conduit
re-purposed and routed down the tunnel.
|
|
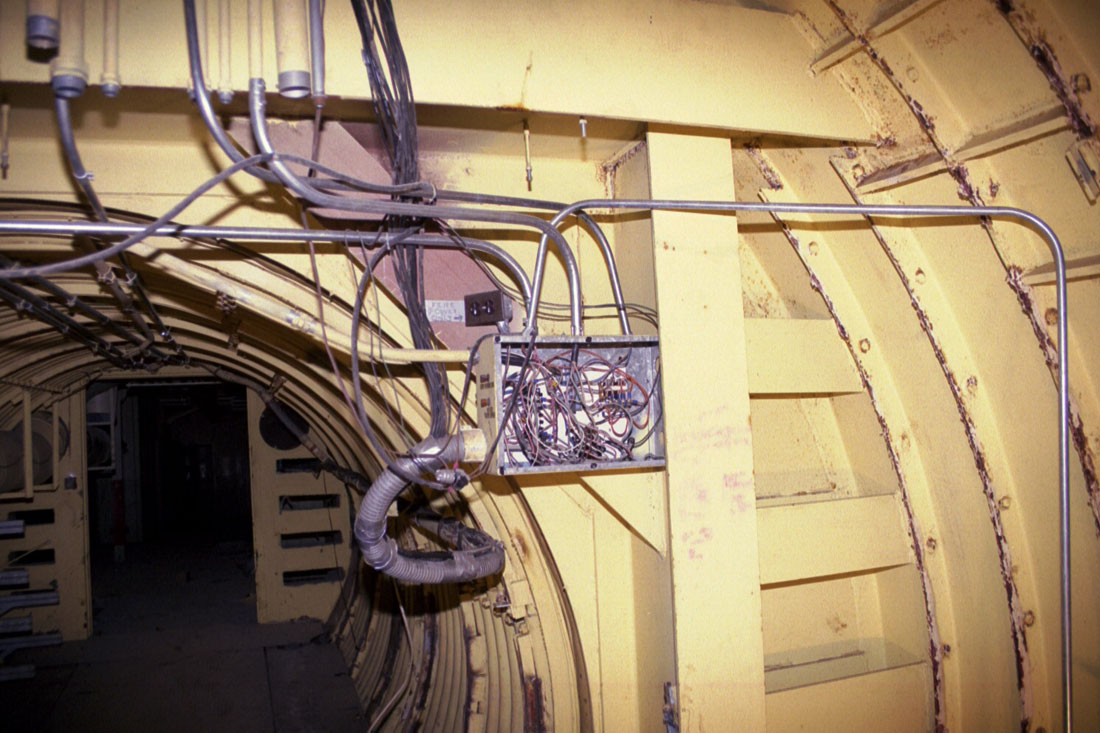
Lowry
724-C, August 2005: Here you can see the heavy I-beam reinforcement
around the tunnel opening. They really didn't want this area to
cave in during an attack, and who could blame them?.
|
|
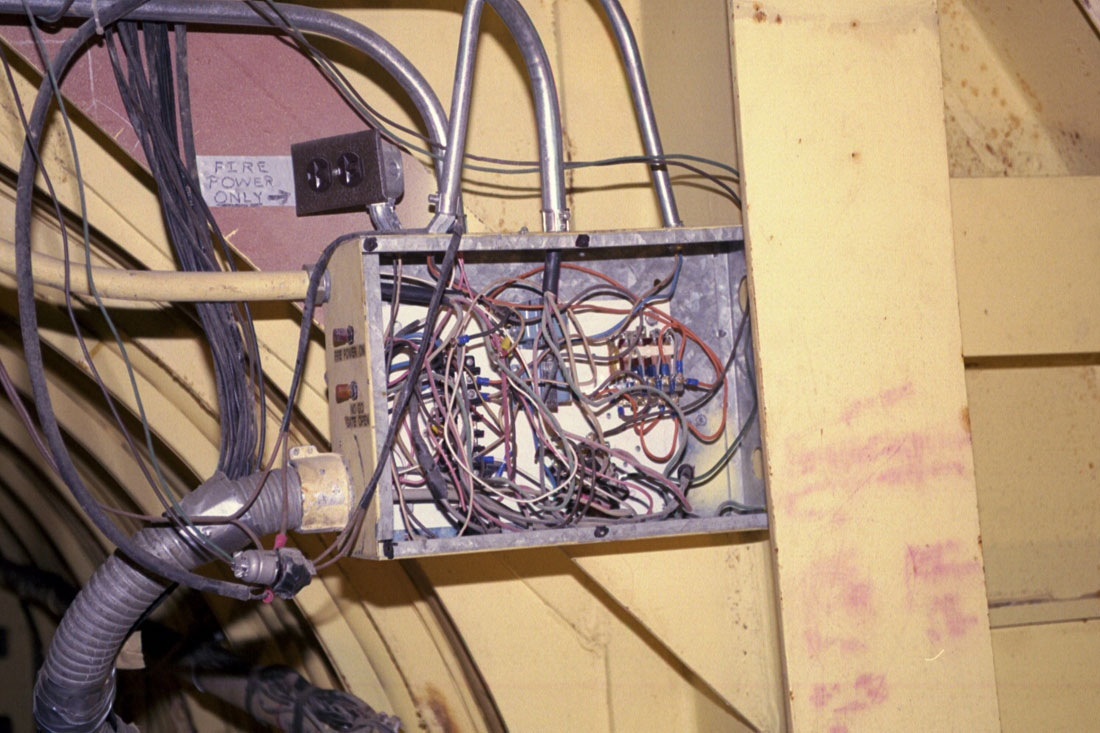
Lowry
724-C, August 2005: Close up on the Mickey Mouse wiring. A rat's
nest of cable runs through a re-used junction box. You'll notice
that the outlet sprouting from the top is labeled with a piece of paper
tape that reads: FIRE POWER ONLY ==>
On
the side you can see two buttons labeled: FIRE POWER ON and NO GO GATE
OPEN. I cannot say exactly what all this was for, but it sounds
serious!
|
|
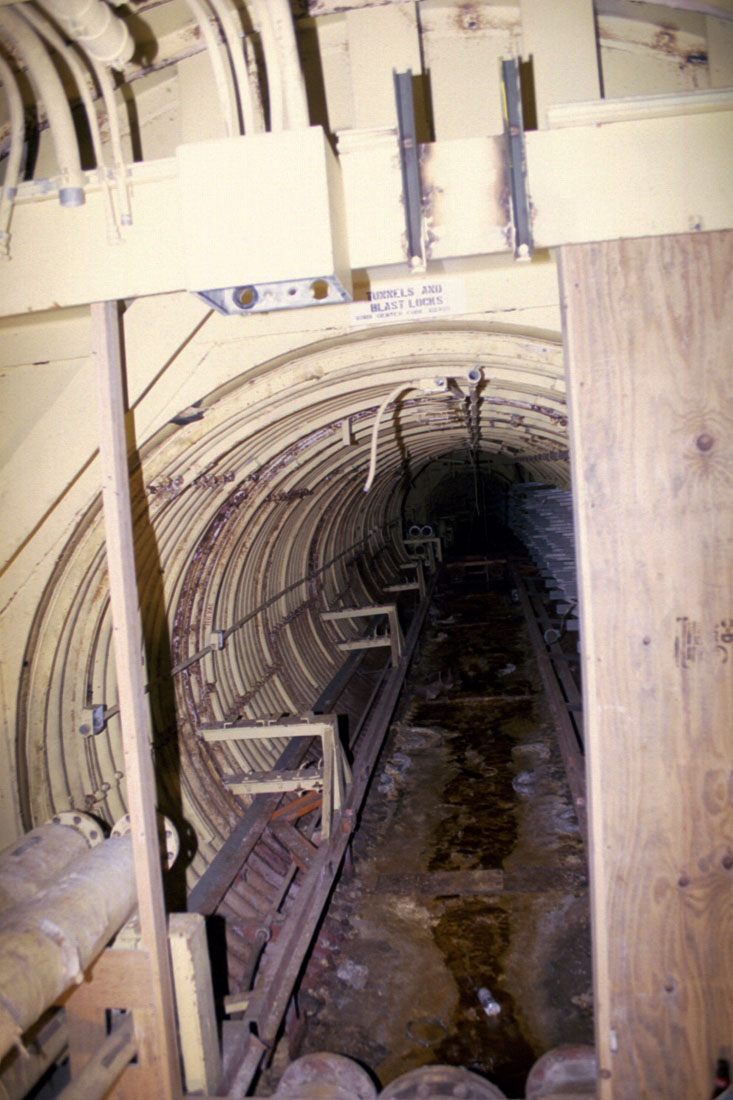
Lowry
724-C, 2000: This is the entrance to the launcher tunnels, more or less
as it appears today. You can see that at one point it had been
covered over with plywood. When I took a closer look, I found that
it had also been outfitted with an alarm system. How very
interesting.
Now
why would someone do that I wonder?
|
This
stretch of tunnels leading to and between the blast locks and the
launchers typically finds one in areas of greater and greater
peril. The floor is wet with water and slick with mud, footing
is uneven and strewn with jagged metal debris or even flooded
completely with dark water of unknown depth forcing you to cling to
the walls and balance on narrow beams to avoid it. Metal
projects out from the walls and floor and there's always a rich supply
of hidden trip hazards or low obstacles to stub your feet on.
The
further back you go, the wetter the tunnels become at 724-C with small
areas of dryness in between as the tunnels slope and then level out
before sloping again. In the low spots, fetid pools of water of
indeterminate depth wait for the careless to take one misstep and
plunge in. Beneath the water, other dangers lurk in the form of
ragged steel and other discarded metal along with submerged beams,
exposed but hidden by the water and very unyielding. Dead
animals float in some tunnels, victims of the open escape shaft their
corpses liquefy leaving nauseating clumps of matted fur floating on
the surface. Trust me, you do not want to fall in that
water.
|

Mountain
Home 569-C, January 16th, 1962: Construction photo looking down the
launcher tunnel. Cable tray and cabling alike await installation
on either side of the tunnel. The electricians out there viewing
this will recognize the tripod pipe stand vise/rig at the right side of
the photo as one of the standard tools of the trade. It's
interesting to see that it has remained completely unchanged after
decades and decades.
Photo
courtesy of Fred Epler
|
|
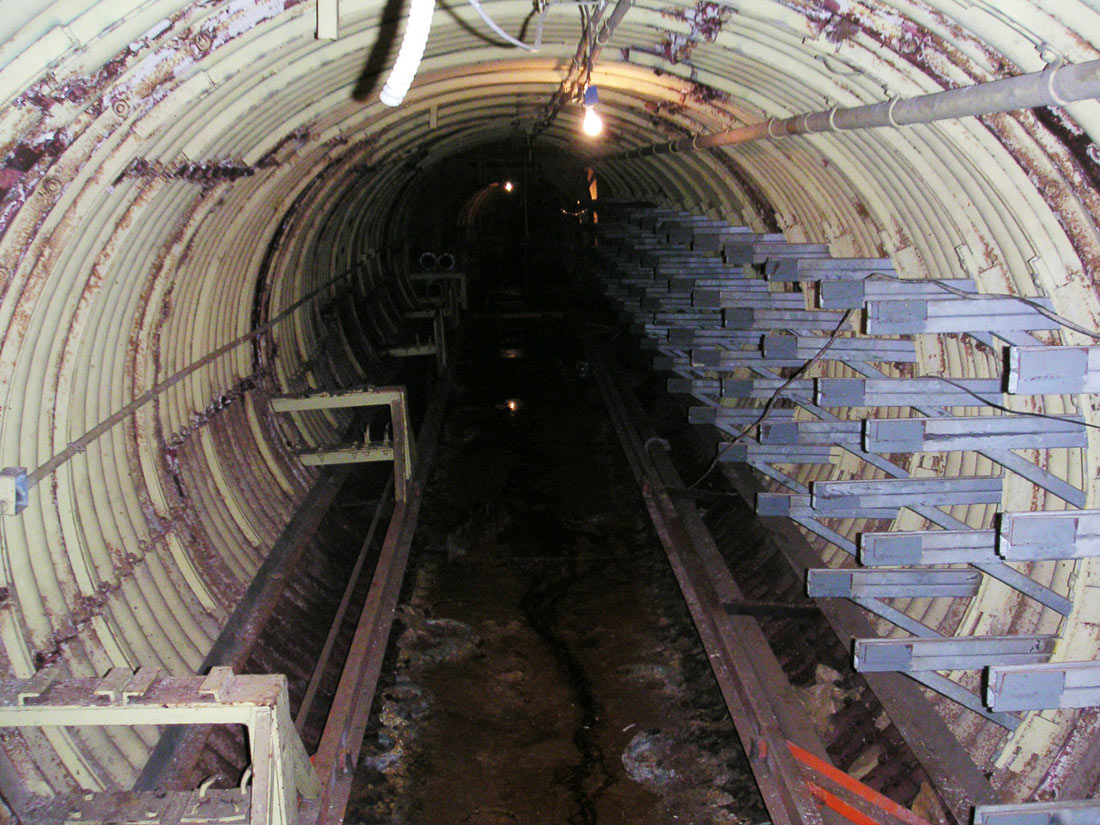
Lowry
724-C, August 2005: Almost the same view as the previous photo showing
the nearly gutted launcher tunnel with the floor panels, plumbing, cable
trays and conduit removed. Nasty red mud full of iron oxide lines
the bottom and a trickle of water from tunnel junction #12 just ahead
seeps downhill into the main tunnel and toward the power house.
We
had just added some bare 100-watt bulbs along the tunnels all the way to
launcher silo #1 before this photo. Turns out we overloaded the
circuit and had to unscrew some lights along the way to avoid tripping
the breaker. It takes a lot of bulbs to reach silo #1 from here!
|
Where
is Thy Boatman?
At
725-A, the water was much worse and planks and other junk were lain
across gaps in the floor to bridge the water and near feats of
acrobatics were needed to pass through some of the tunnel
junctions. Some sites are so flooded that canoes and inflatable
rafts have been brought in creating a bizarre scene that evokes
(perhaps just ever so slightly) passage across some small tributary of
the River Styx.
Networks
of scavenged detritus ford the flooded expanses in the blast locks at
725-A in an unsteady and unnerving trail that half floats on other
junk and half teeters on the edges of submerged beams. It took
nerve to get through some of those tunnels and often blind luck saw me
through somehow.
|
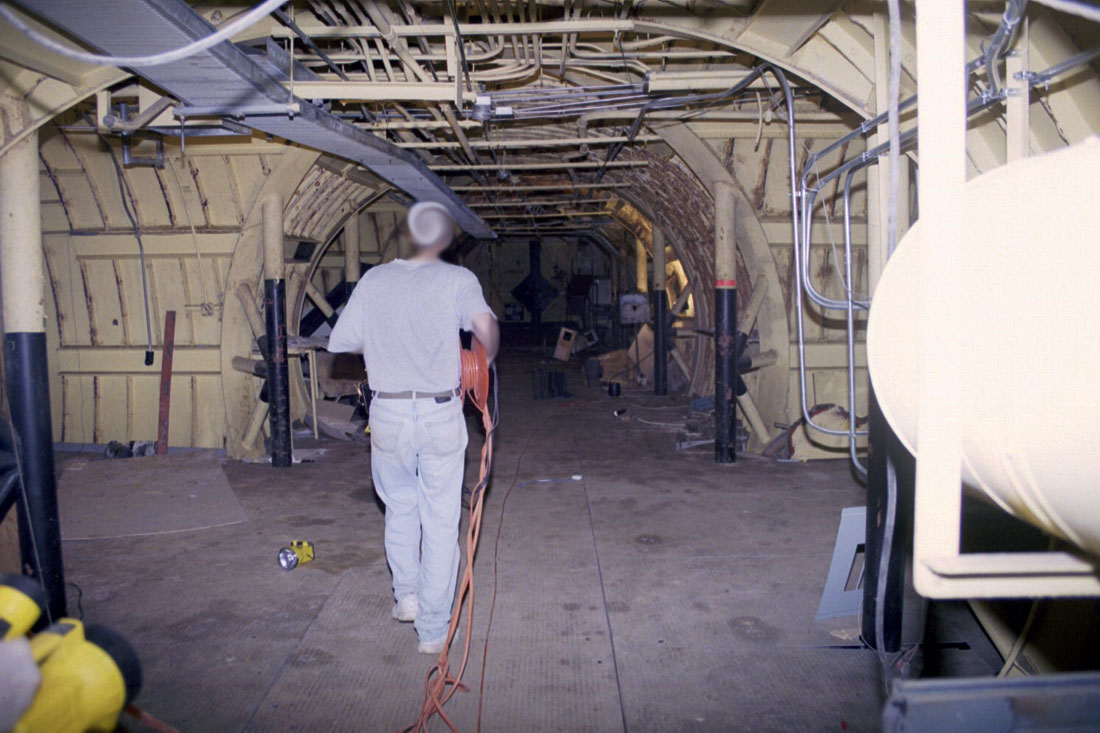
Lowry
724-C, 1999: Mr. X routing temporary power along the tunnel junction in
order to extend much-needed lighting into the control dome. This
view is from the connecting tunnel leading to the control center and
looking toward the power house on the opposite end with the black
diamond on the doors.
|
Of
course, I'm getting ahead of myself, we're still back here in the
relative safety of good ol' TJ#10 where the floors are dry
(mostly) and the way is clear (results may vary) and there is ample room
to move freely (usually) without obstruction or imminent threat of grievous
bodily harm.
And
so you can relax here as there is little to push the envelope of your
comfort zone while you wonder under the vaulted steel ceilings about
all that went on here.
|
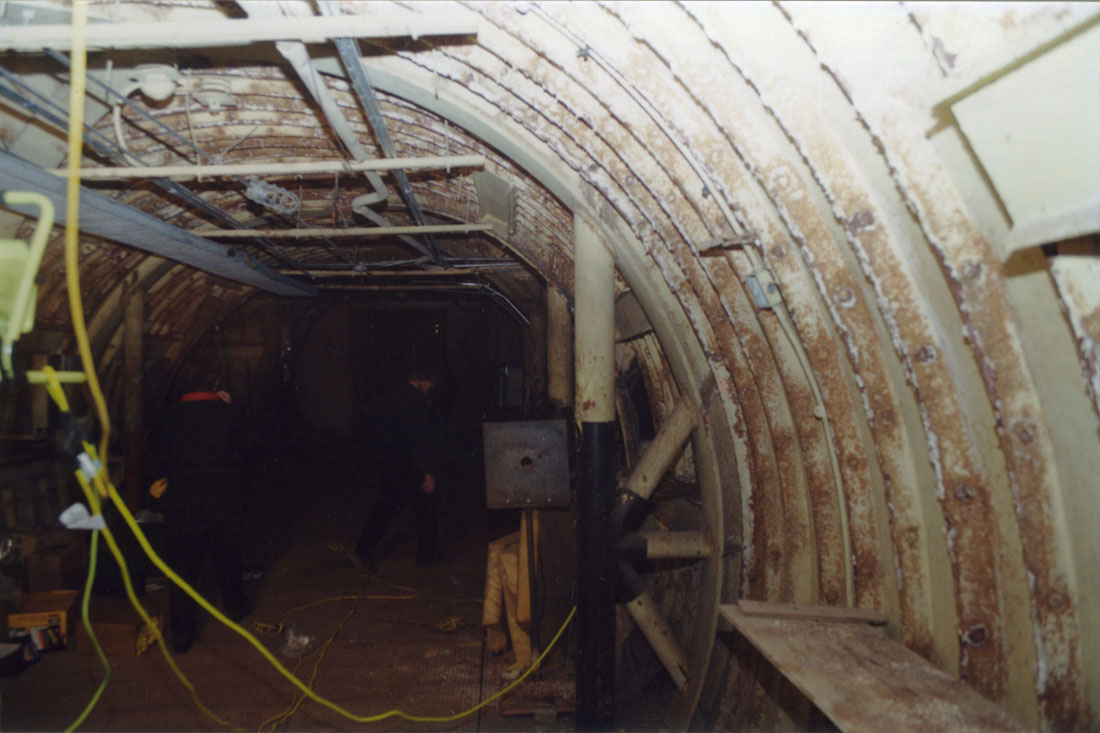
Lowry
724-C, 1999: More creative electrical work can be seen in this dismal
shot of the tunnel junction. Note the steel plate with the hole in
it at center. That's a holdover from the defense contractors that
once occupied the site. The plate appears to have been a
ballistics target. Other similar rigs were located in the antenna
tunnel and control center.
The
shadowy figures of 2 silo gnomes can be seen ambling about in the
darkness.
|
|
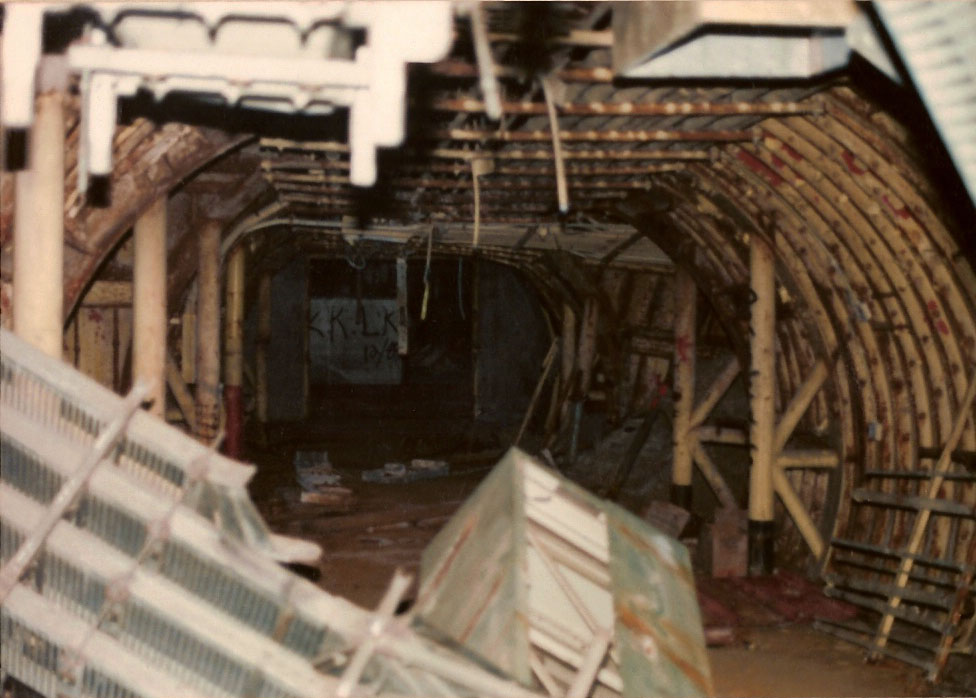
Lowry
724-A, sometime in the 1970's: Looking toward the power house past all
the garbage and rust at a thoroughly abused site. Of course, the
only difference between this site and 724-C is essentially that the
latter had most of the junk cleaned up later on.
Photo
courtesy of Fred Epler
|
The
next section looks at the last nooks and crannies of the main tunnel
junction, peering into the power house (just a tad) and even under the
floor (where, it turns out, Tad lives).
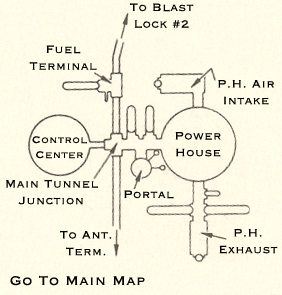
From
here you can continue to Main
Tunnel Junction Part IV, or you can select another location from the map below or go the Main
Map:
Current
Location: Main Tunnel Junction (TJ #10) Part III
|
Where
would you like to go next?
|

|
Contact
| Site Map | Links |
Hosted by
InfoBunker

